

How To Properly Clean A Gen 5 Glock 17
When a friend conducted a weapons inspection at his section recently, he was dismayed to find that most of his officers did a poor job of maintaining their duty firearms. The striker-fired guns (like the Glock pistols and Smith & Wesson M&P pistols) that are so popular with police officers were in particularly bad shape and demonstrated a distressing number of failures to burn and eject as a result of poor maintenance practices.
To help make a dent in this problem, allow's discuss what you lot need to do in order to proceed your Glock pistol running well.
While we're singling out the Glock pistol in particular, because of its dominance in the law enforcement market place, this information will too apply to similar, striker-fired pistols like the Smith & Wesson M&P serial, the Springfield XD/XDM series and the Sig Sauer P320. With slight modifications, information technology volition likewise apply to hammer-fired pistols of various designs.
getting started
Before we swoop into the particulars, a few full general rules employ:
Read your owner's manual! Cops being cops, I know about of yous have never cracked this open up! Do yourself a favor and read the transmission that came with your gun for the manufacturer's recommendations on how to disassemble, clean and reassemble your pistol. There's some proficient stuff in there, honest.
Follow the safe rules! It's essential to follow your agency'due south firearms condom rules every time you handle your firearm. Earlier yous attempt to disassemble and clean your firearm, y'all must safely unload/clear it in accord with the process described by the manufacturer or your agency, and ensure that the ammunition remains separate from the gun (ideally, in another location) until you've made the witting decision to load information technology over again.
Protective measures. Wear safety goggles to protect your optics, and disposable gloves to continue lead and chemical residue off your skin. Ensure the area yous're working in has adequate ventilation. Make clean upward your work expanse when y'all're finished, then launder your hands and face with cold water and soap (cold water is better than hot, to keep your pare's pores from opening up and increasing your exposure), to avoid getting any chemicals or rest in your eyes, nose, or oral cavity.
how to clean your glock
A variety of cleaning products, tools and methods are bachelor. Our goal here is to hash out a uncomplicated method, using mutual resources, so if you accept a different technique or favor a dissimilar product, please continue with it ‒ we're not trying to talk yous out of information technology.
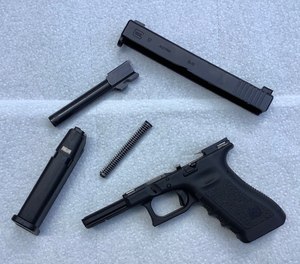
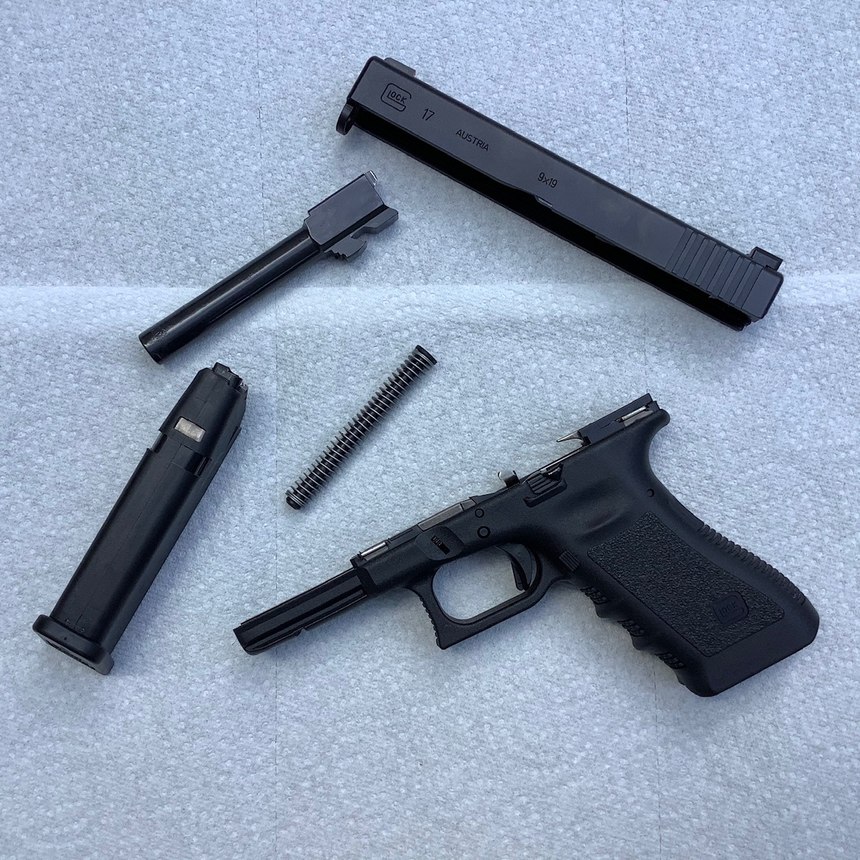
Starting with your protective equipment in place, and a field-stripped firearm, practice the following:
- Run a solvent-soaked patch through the bedchamber and bore of your barrel several times, blanket the feed ramp, chamber and interior of the butt evenly. Prepare the butt aside to soak.
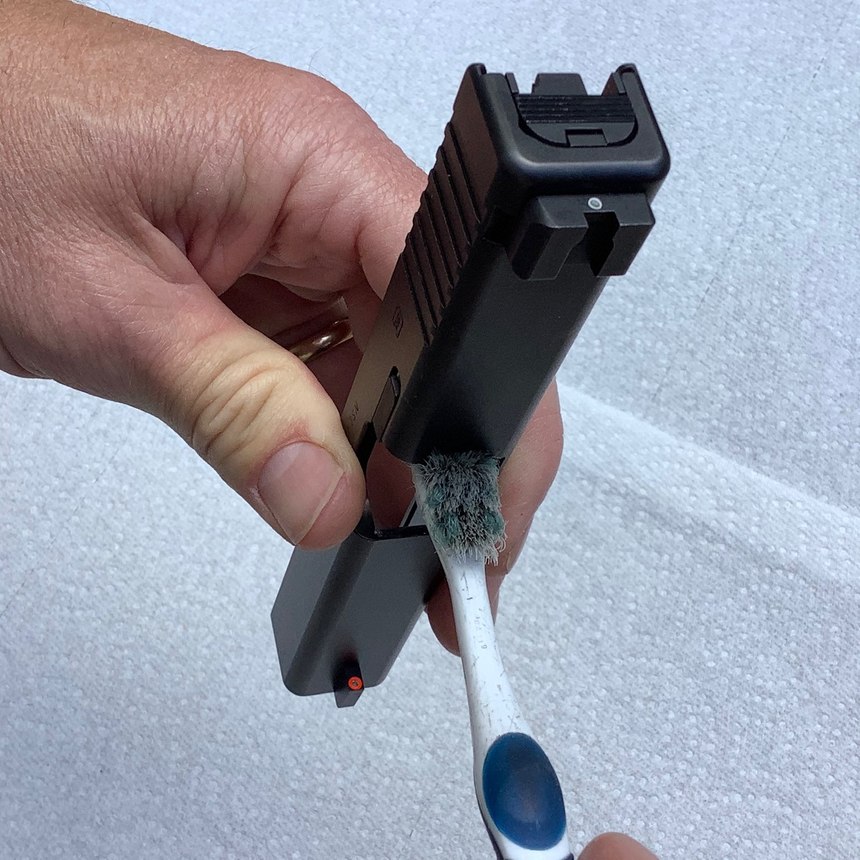
- Wipe the interior of your slide with a dry patch or rag, to get the large stuff off. Wet a toothbrush with a small amount of solvent, and scrub the interior surfaces, paying close attention to the breech face and slide rails. As you're scrubbing, try to agree the slide muzzle terminate down to avoid having the solvent run into the interior of the striker channel, which nosotros desire to continue dry. Prepare the slide aside to soak for a while, muzzle end downwards, so that whatever solvent that made its style into the striker channel can bleed out.
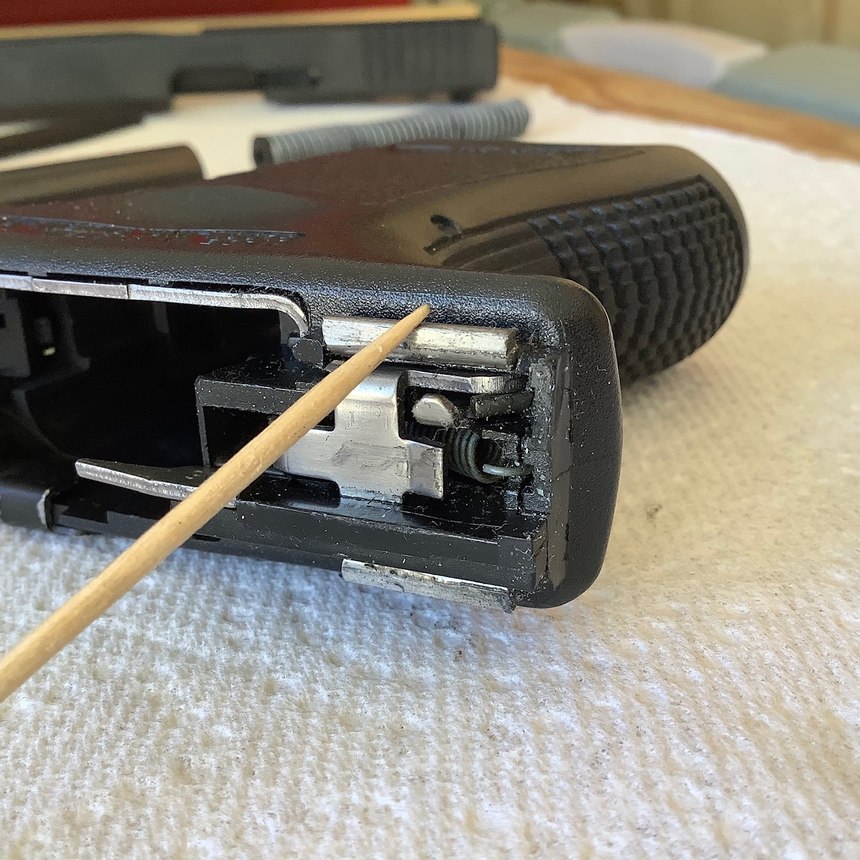
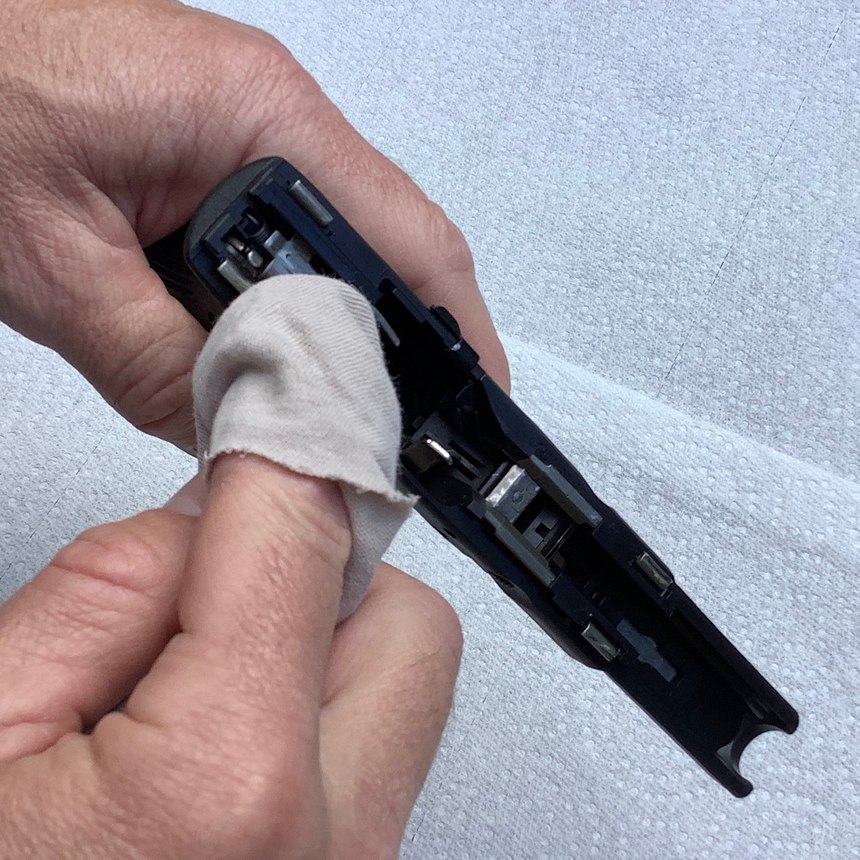
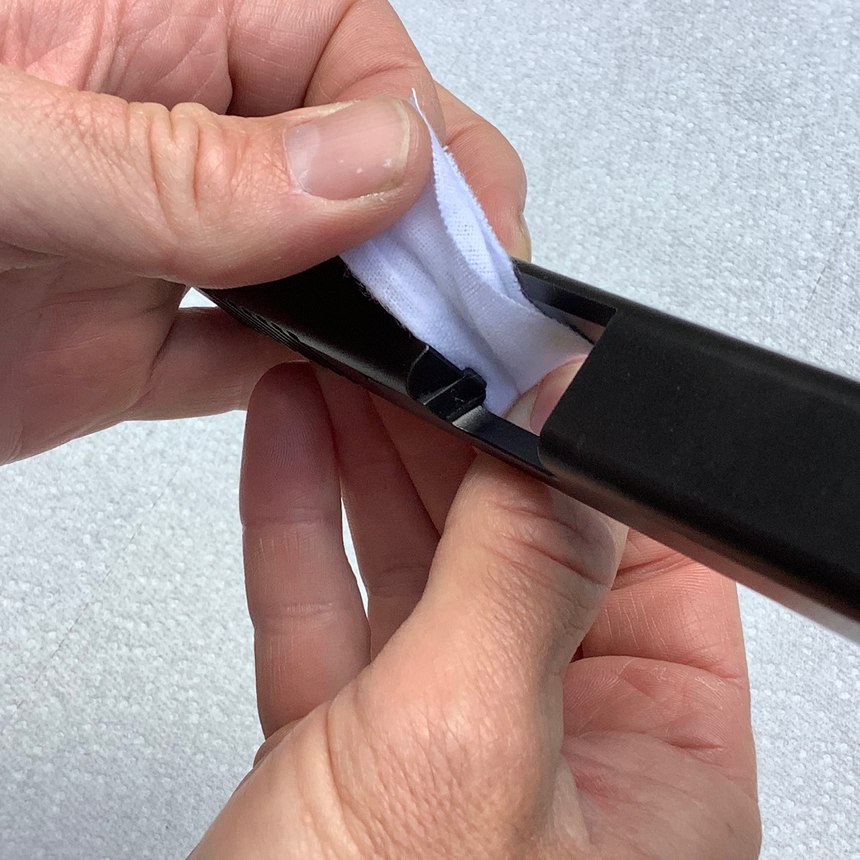
- Clean the frame of your pistol with a dry patch or rag. Get the carbon, clay and other fouling off the outside of the frame, the interior of the magazine well and the accessible interior of the gun. Wipe down the rails, trigger bar, ejector and connector area as well (refer to your manual to identify these parts if you don't know what they are).
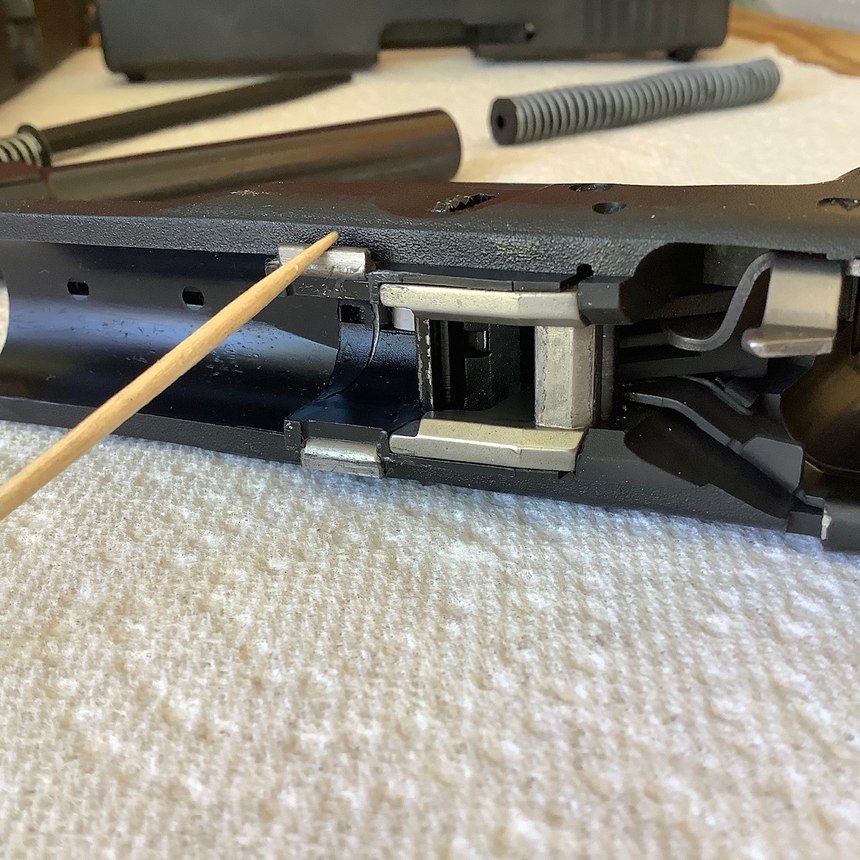
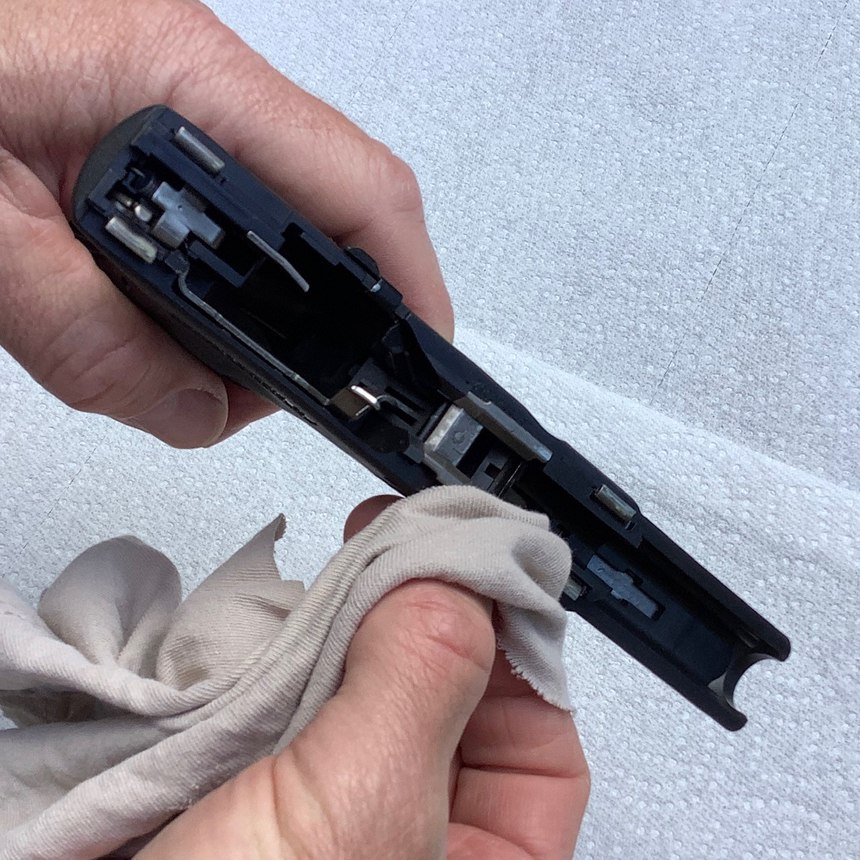
- At present that you've got the big stuff off the frame, go back through with a toothbrush and a clean patch or rag to get the nooks and crannies clean. You may need to put a little solvent on the brush or patch to get some of the fouling off these parts ‒ if so, make sure you wipe the surfaces clean afterward and don't get out a agglomeration of solvent behind. If necessary, use an air hose or a can of compressed air to blow the solvent out of the areas where it may exist hiding. The goal here is to go everything clean and dry.
- Wipe down your recoil spring assembly with a dry patch or rag. It shouldn't need much attention ‒ just try to get it clean and dry. A dry out toothbrush might assist, likewise.
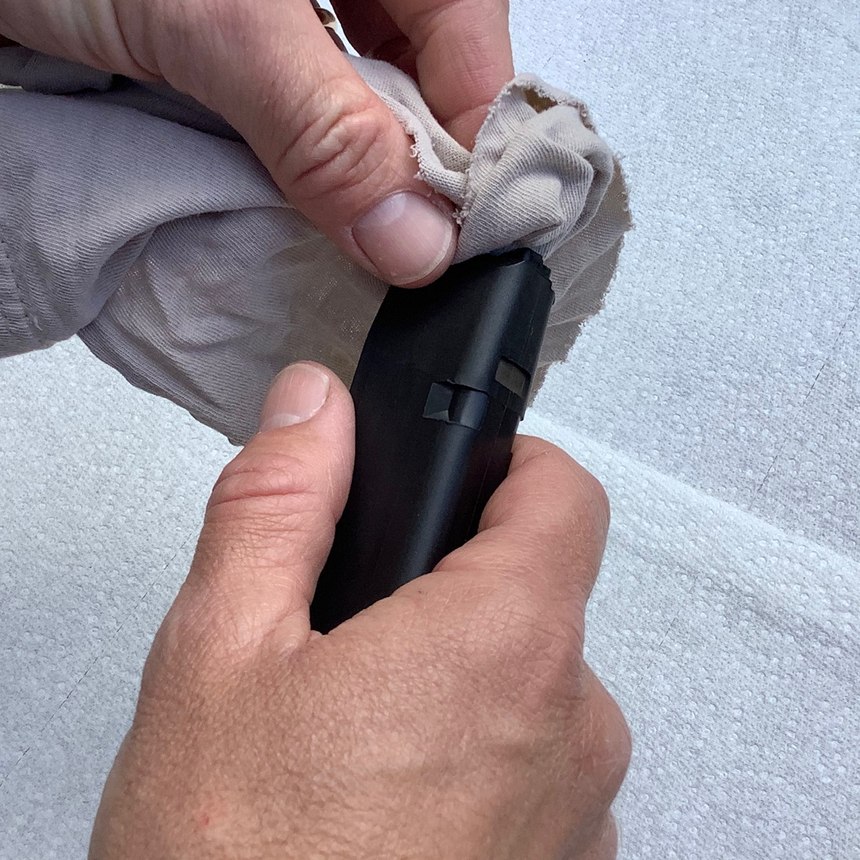
- Wipe downwards the exterior of your magazines with a dry patch or rag to get the carbon fouling and dirt off. Pay shut attending to getting the follower and feed lips clean – a dry out brush might be helpful here. If you lot're concerned that water, sand, dirt or other debris got within the magazine, and so y'all'll desire to detach the mag and clean it, as we've previously discussed here. That'southward a skillful affair to do periodically anyhow, but y'all don't take to detach your magazines for cleaning every time. Over again, your goal is to get your magazines make clean and dry. Don't lubricate them or exit any solvent backside to attract more than dirt. Clean and dry.
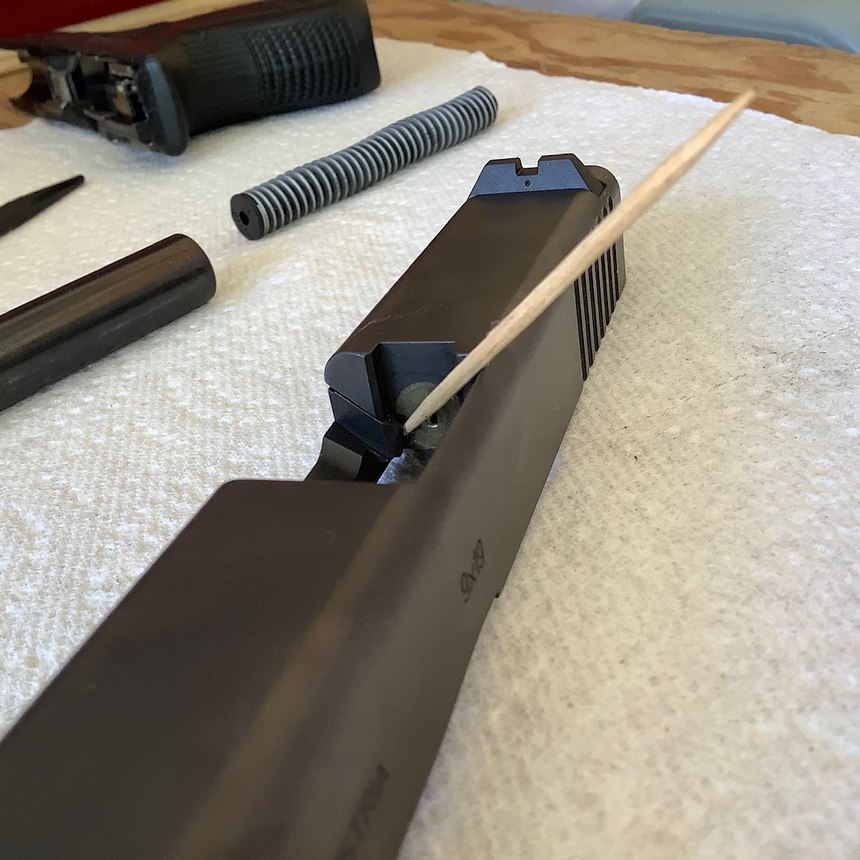
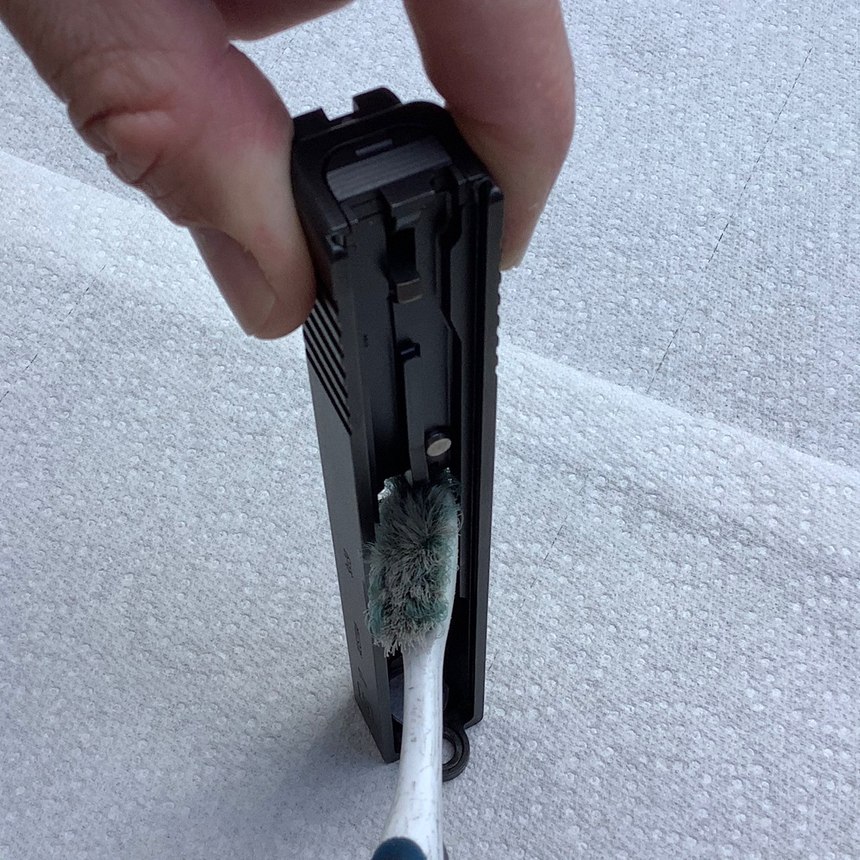
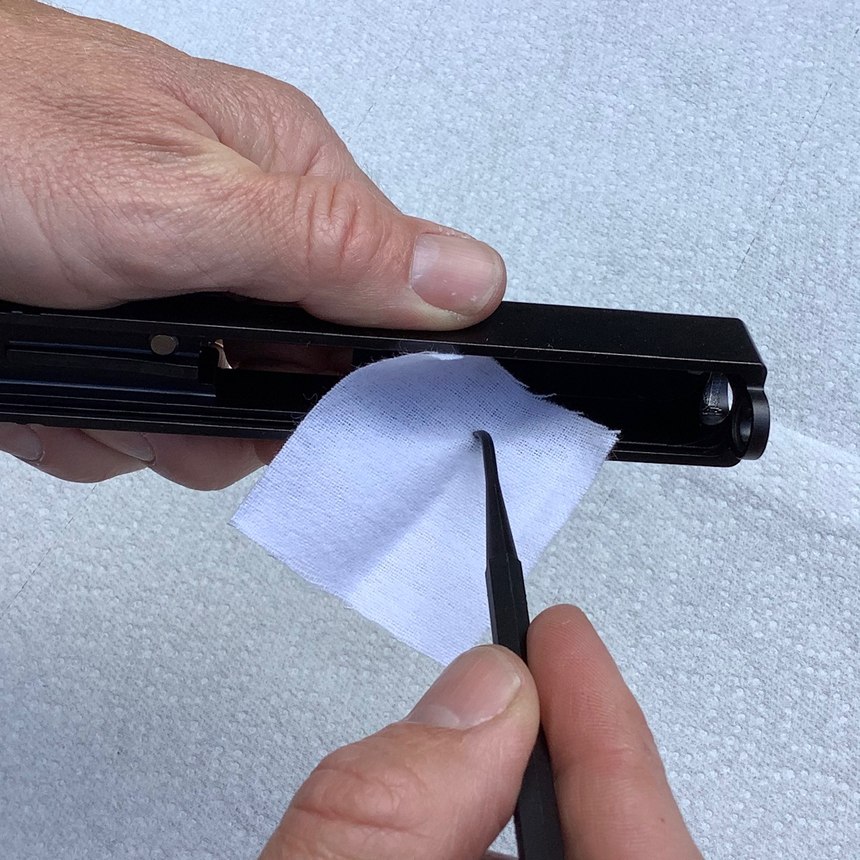
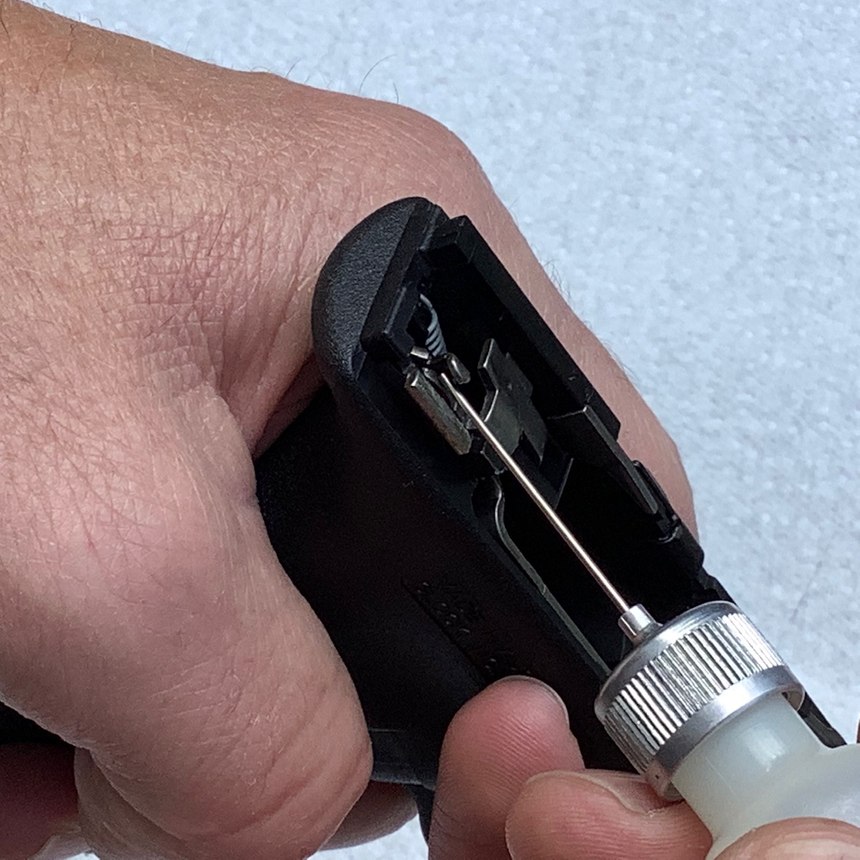
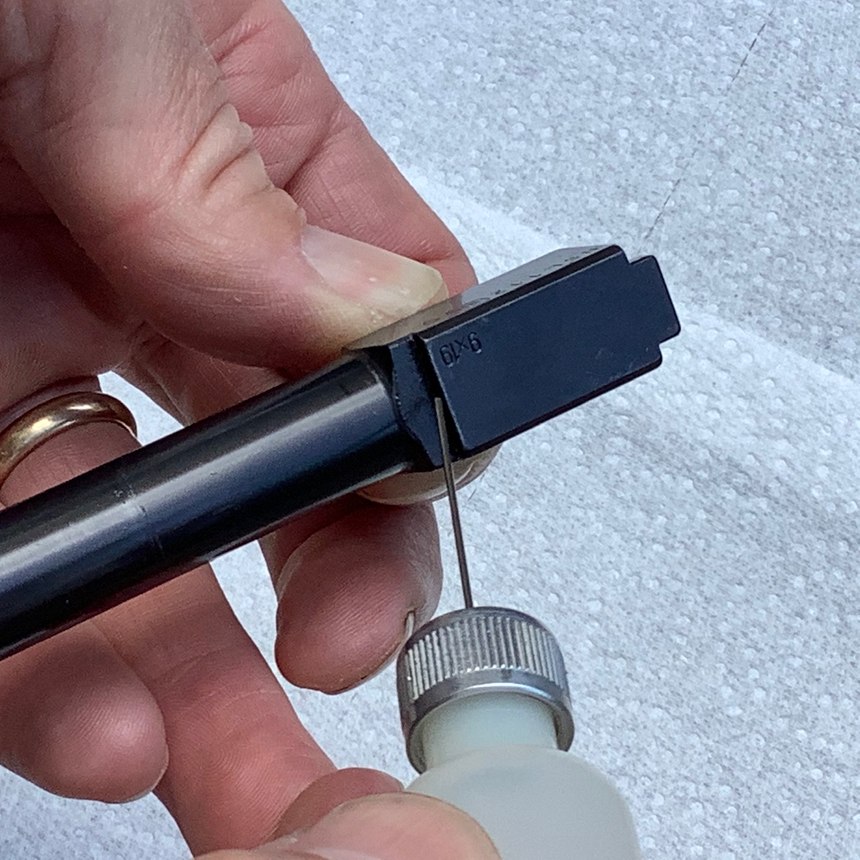
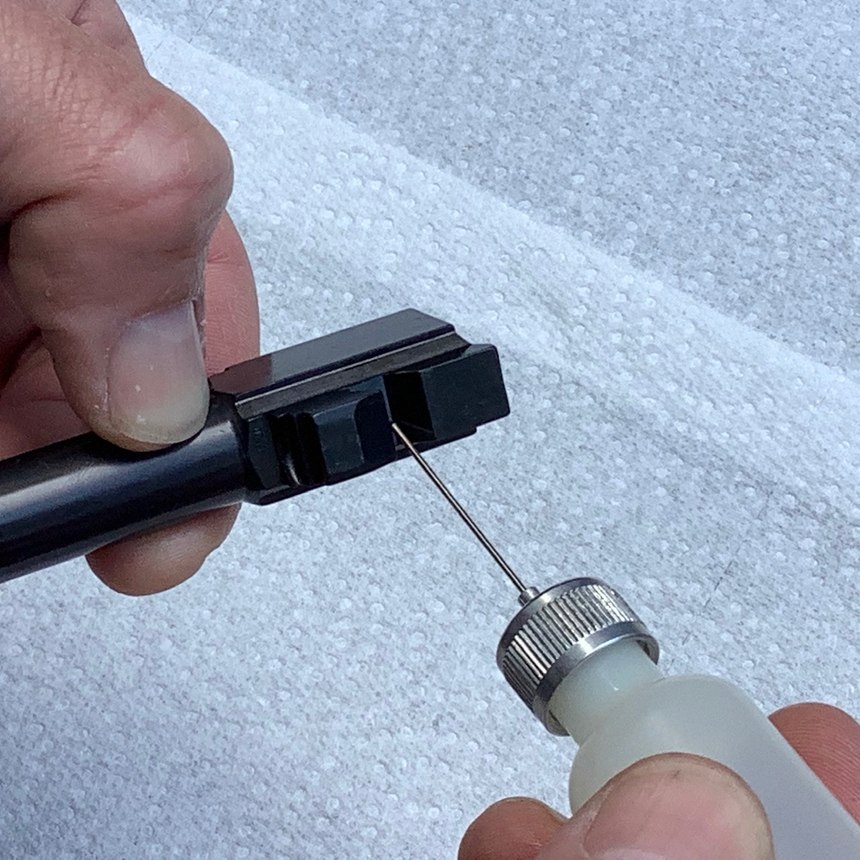
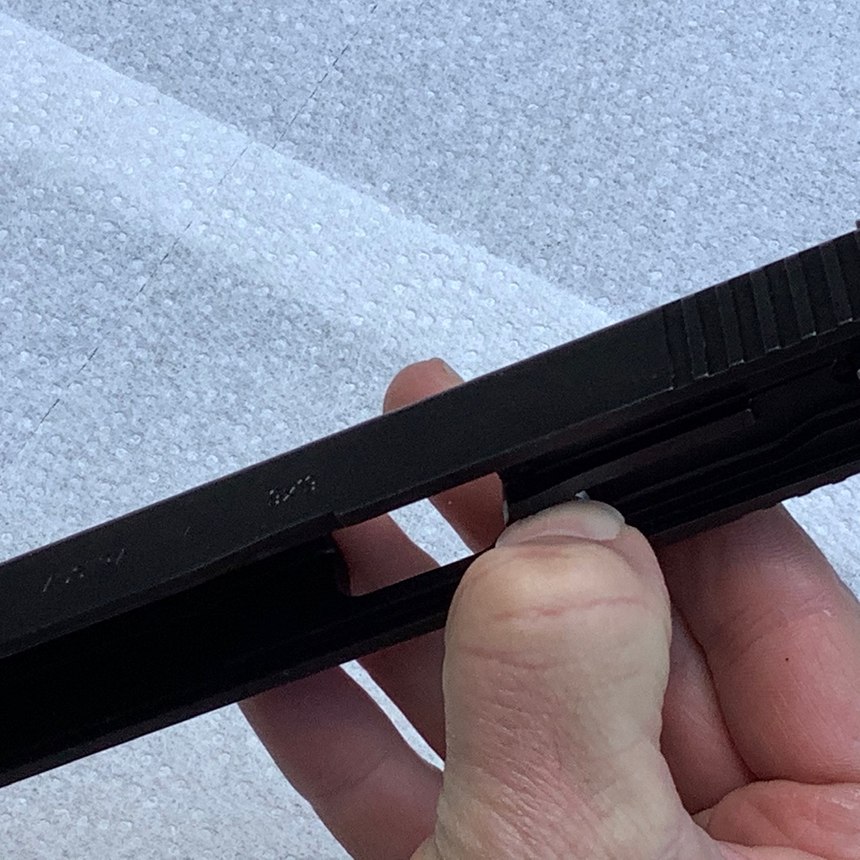
- Let'southward return to the slide. Scrub it a little more with your castor, then wipe everything down to become the interior and outside clean and dry. To go the rails make clean, push a dry out patch down into the rail with your toothbrush or a non-marring tool (like a plastic pick, wooden toothpick, or the paper shaft of a Q-Tip) and wipe clean from end to end – you'll probably need several passes to do this. Make sure the breech face is clean and polish, with no raised fouling on the surface (similar rings of carbon or primer sealant). If necessary, apply a contumely brush or a non-marring tool to scrub or scrape the breech face clean. Go a clean patch behind the extractor hook and remove any gunk that built upwardly there. (It will be periodically necessary to disassemble the slide to clean the extractor properly, and the striker/channel likewise ‒ talk to your department armorer almost this.) Lastly, wipe downward the outside. Remove whatsoever gunk around the extractor pocket, and ensure that your sights are cleaned off, so you lot can see them properly.
- Time for the barrel again. Run that solvent-soaked patch through the bore several more times, and so run a few dry patches through the bore to go the gunk out and get the bore mostly dry. Use a dry patch or rag to make clean up the feed ramp, to brand it clean and shiny (a toothbrush might assistance, if it'southward actually fouled). Put a bristle brush on the end of the cleaning rod and run it through the barrel, from the rear, nigh five-ten times. Wet a patch with oil and swab the barrel to clear out any particulates, then follow up with dry patches through the barrel to remove whatsoever oil and suspended droppings. Audit the diameter and chamber to ensure they are clean. If not, then repeat the procedure as required, until yous get the results you desire. Wipe down the exterior of the barrel with your rag, so that both interior and outside are clean and dry out.


Lubricating your glock
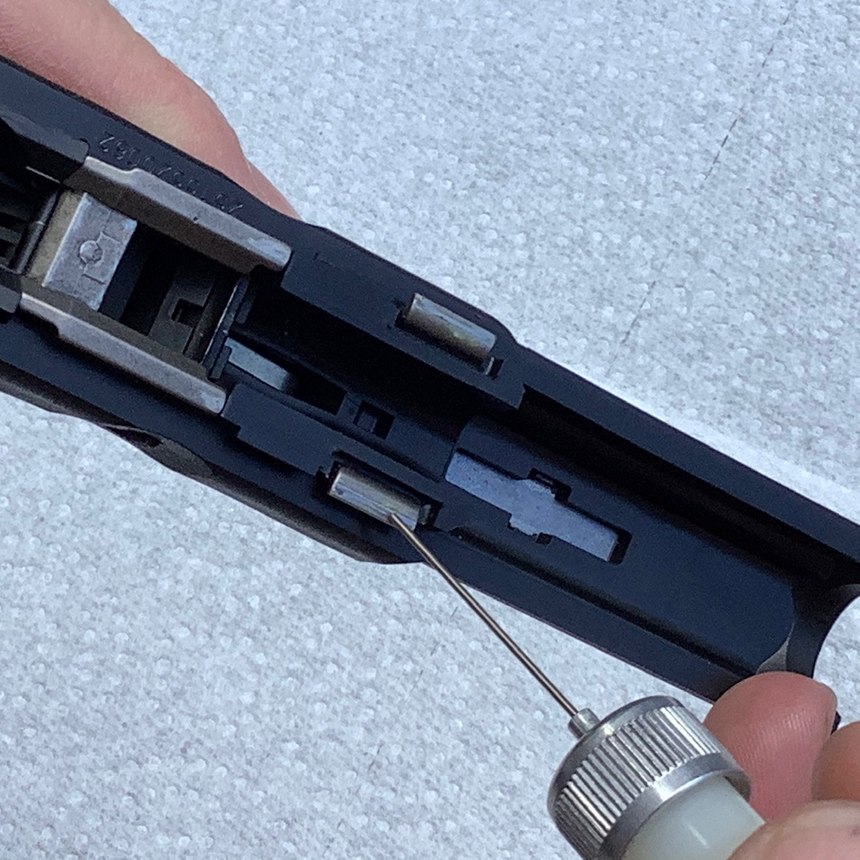
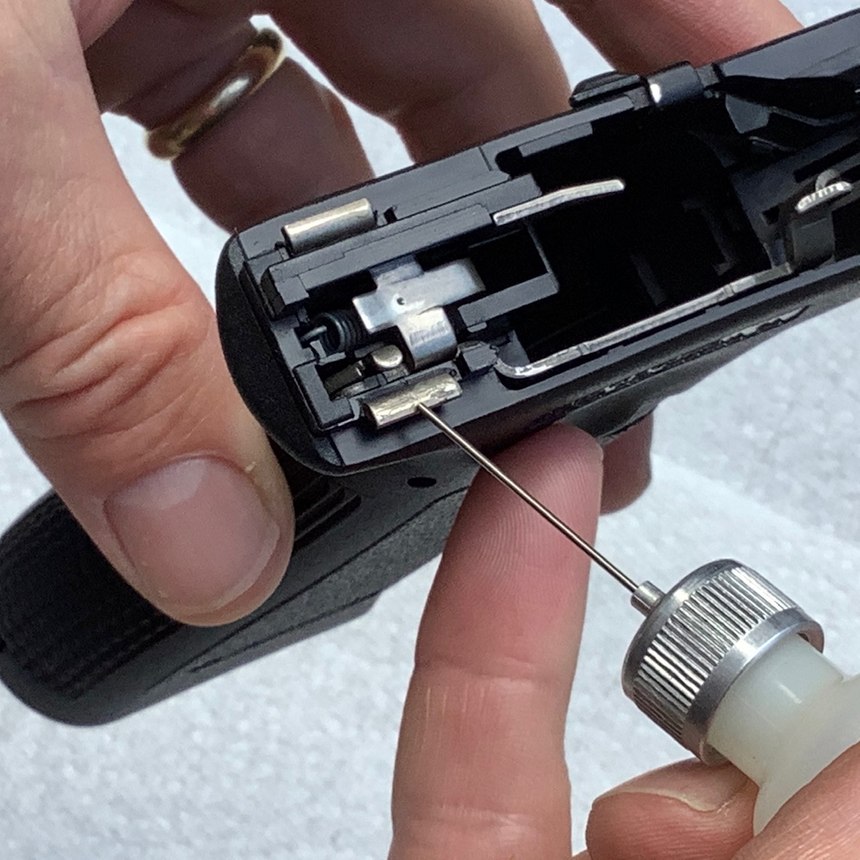
When the parts are cleaned to your satisfaction, lubricate and reassemble your pistol. Be sparing with the oil, considering you don't need much to ensure proper function, and whatever backlog will only attract dirt. Furthermore, excess oil will coalesce and turn into a viscid rest that might impair the reliability of your pistol.
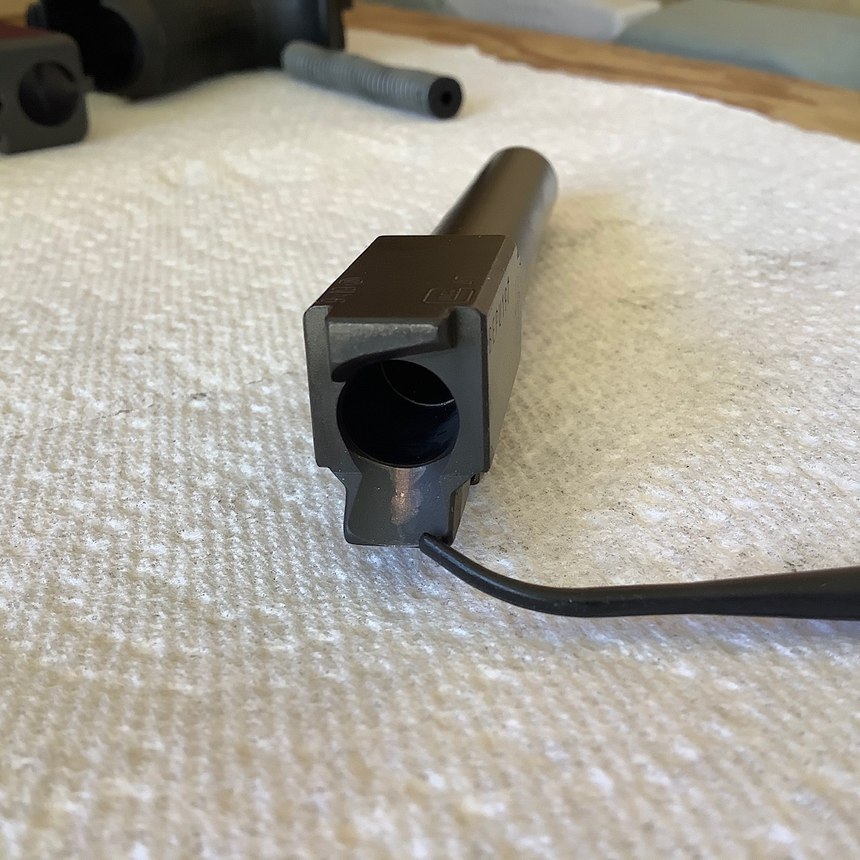
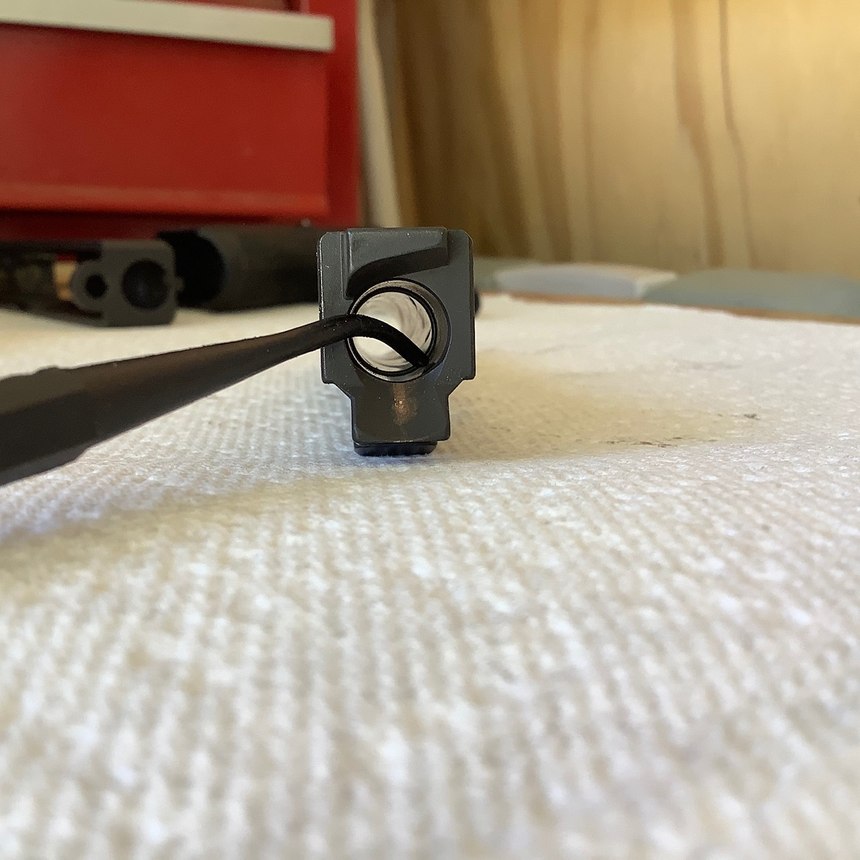
- Identify a small driblet of oil on the top exterior of the barrel virtually the cage. With your finger, smear it around the outside circumference of the barrel to distribute it in a ring.
- Place a small driblet of oil on the square shelf where the hood of the barrel locks upward into the slide. Smear it around the top of the hood with your finger then insert the barrel into the slide. Smear the remaining oil on your finger onto the locking lug on the underside of the barrel, and then install the recoil spring assembly.
- While the gun is nevertheless apart, perform the firing pin safety cheque. Depress and agree the firing pin safety plunger in the bottom of the slide with your thumb, and milk shake the slide dorsum and forth ‒ yous should hear the firing pivot/striker freely moving back and forth in the slide.
- Identify a small drop of oil on each of the four frame track, so smear it around with your finger to coat the top, side, and underside of each rail.
- Identify a small drib of oil where the trigger bar meets the connector.
- Install the slide on the frame, and rack information technology several times to distribute the oil on the rails, barrel, and butt hood.
- Wipe down the exterior of the pistol with a clean rag, to make clean up any excess oil.

Function bank check
Once the pistol is lubricated and assembled, perform a function check to ensure the system is working properly.
- Ensure the firearm and magazines are unloaded.
- Without a mag in identify, rack and release the slide to cock the striker. Aiming the unloaded pistol in a prophylactic management, pull and hold the trigger to the rear. You should hear and feel the striker slam forrad when you pull the trigger.
- While belongings the trigger to the rear, rack and release the slide to cock the striker once again.
- Slowly release the trigger, and mind/experience for the trigger to reset.
- Insert an unloaded mag into the pistol.
- Rack the slide to the rear. It should remain back with an unloaded magazine in place.
- Remove the magazine and set information technology bated.
- Tug and release the slide, or push the slide lock lever down, to send the slide forward into battery.
- Insert another unloaded mag into the pistol. Repeat steps 6-8 as required, for all your unloaded magazines, to ensure all of them volition lock the slide to the rear.
Load up
Once the office cheque is complete, move to the location where your armament has been stored and tell yourself, "No more practice, COMBAT Mode." This may sound a little silly, but it helps to establish that hard mental break that is necessary to prevent a negligent belch from trying ane more "dry burn down."
Prepare your magazines with cartridges and load your pistol. Put the pistol in your holster and your magazines in their pouches, and secure your equipment. Fight the temptation to do any last-2d cleaning or inspections as you put your gear away because that's how accidents happen.
Hit the streets with your clean and lubricated pistol, and be safe out at that place!
Side by side: 5 important lessons about firearms maintenance
Well-nigh the author
Mike Wood is the son of a 30-year California Highway Patrolman and the author of "Newhall Shooting: A Tactical Analysis," the highly-acclaimed study of the 1970 California Highway Patrol gunfight in Newhall, California. Mike is an Accolade Graduate of the United States Air Force University, a graduate of the The states Army Airborne Schoolhouse, and a retired US Air Force Lieutenant Colonel with over 26 years of service. He'southward a National Rifle Association (NRA) Police Enforcement Division-certified firearms instructor, senior editor at RevolverGuy.com, and has been a featured guest on the Excellence In Grooming University and American Warrior Club podcasts, also as several radio and television programs. He's grateful for the opportunity to serve and acquire from the men and women of law enforcement.

Source: https://www.police1.com/police-products/firearms/articles/maintaining-your-glock-pistol-8cMJtI74CvqU4tCl/
Posted by: braselthrear73.blogspot.com
0 Response to "How To Properly Clean A Gen 5 Glock 17"
Post a Comment